Retailer with location in Germany
Personal & professional consultation
24/7 customer support
100% customer satisfaction

Build your own mining rig - the ultimate guide (2022) straight from the experts (Part 2/2)

Do you want to build your first mining rig yourself? Then you've come to the right place with the ultimate Cryptohall24 guide (2022)! Because here we show you straight step by step and in detail how you can build and set up a mining rig yourself. In the second part of the guide, we will show you how to assemble all the hardware and set up the mining rig with Hive OS. We strongly recommend that you take plenty of time to assemble the hardware, as it is easy to make mistakes the first time, which may damage your hardware. Also make sure (in general) that the hardware is not soiled with dirt or dust and that it does not get damp or wet.

3. Assembling the mining rig

3.1 Assembling the mining rig frame

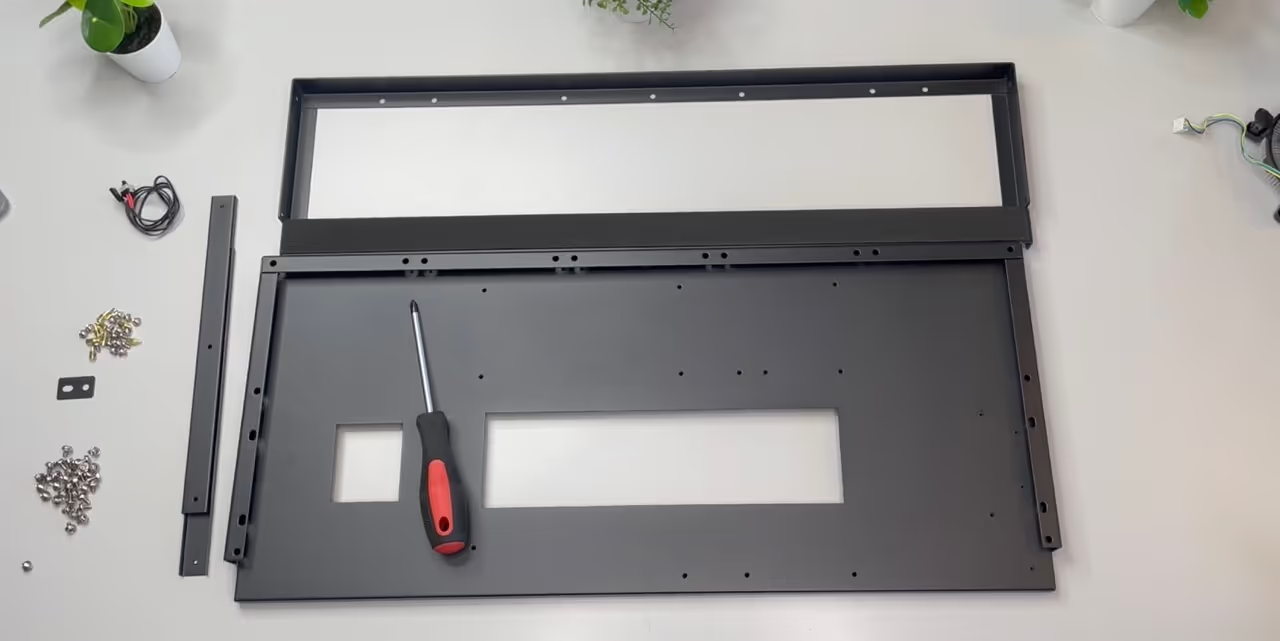
Now let's move on to the first component, the mining rig frame. Most frames are super easy to set up and you can't really go wrong, almost every frame comes with assembly instructions, so we won't go into too much detail here. But what you should make sure is that you tighten all screws properly so that the frame is nice and sturdy.

Mining-Rig Frame Aufbau

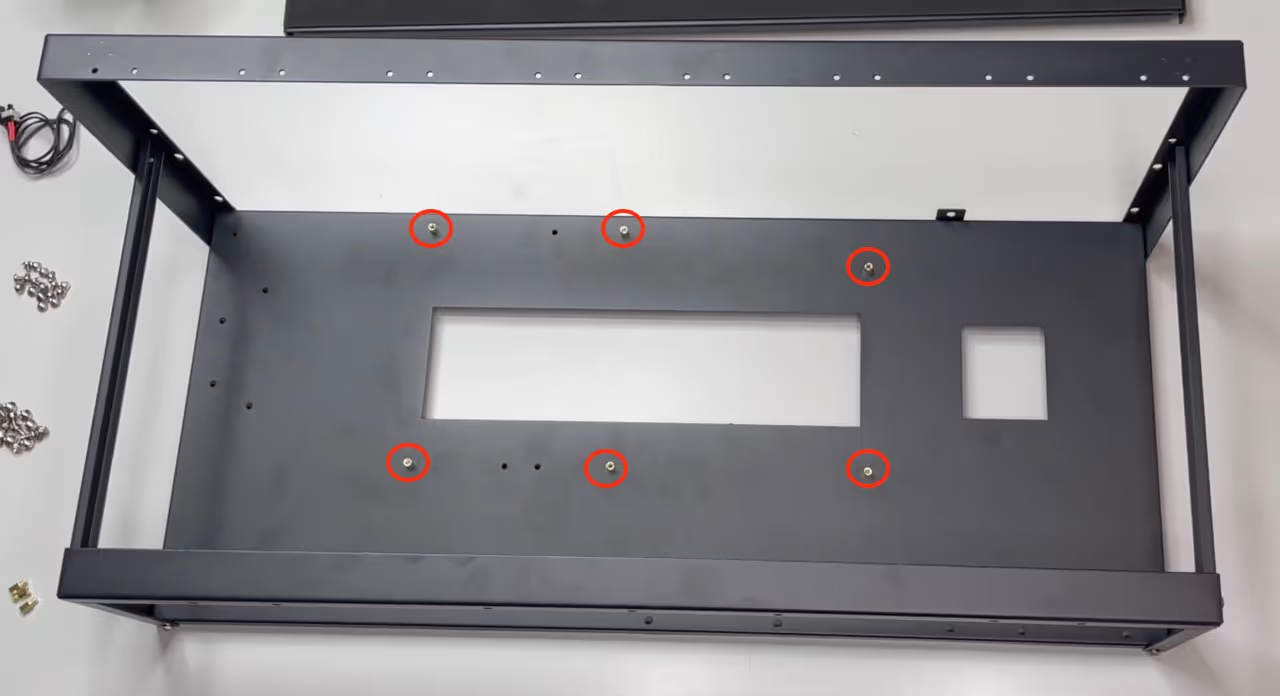
When you have finished assembling the frame, you still need to install the small golden screws - the mainboard holders - correctly. There are different mainboard formats, so it's best to briefly hold the mainboard over the rig and see which threads you need to use for your board.

Aufgebauter Mining Rig Frame für 8 GPUs

3.2 Assembling the mainboard with CPU, CPU cooler and RAM bar

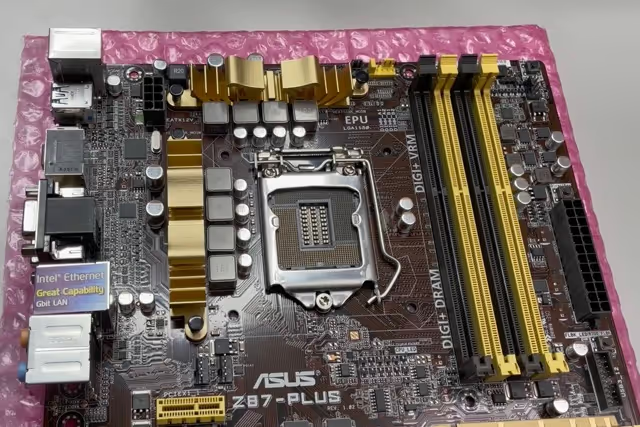
Next we come to the mainboard. First, you need to install the processor in the CPU socket holder. To do this, you need to pull the socket holder (the metal pin) to the side and fold the holder upwards. When inserting the CPU, make sure that you do not bend any of the very fine socket pins on the board and that you insert the processor correctly into the holder. The CPU holder is then closed again.

Mainboard Installation Vorbereitung

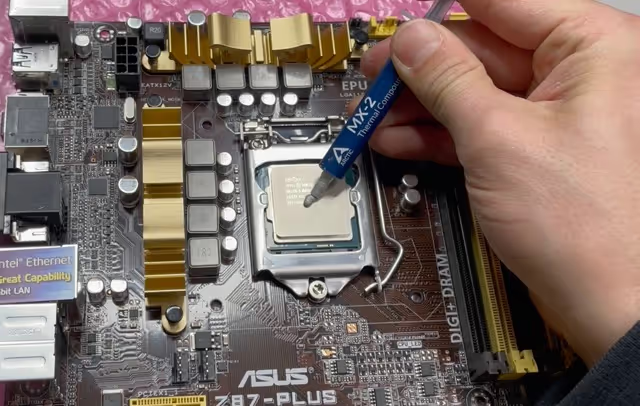
Now you need to apply some thermal paste to the processor so that the heat produced can be properly dissipated to the heat sink. A pea-sized blob is completely sufficient. Incidentally, the processor runs virtually idle during mining and therefore generates little heat, which is why a normal standard CPU fan is perfectly adequate.

Mainboard Installation mit CPU, CPU-Kühler und RAM

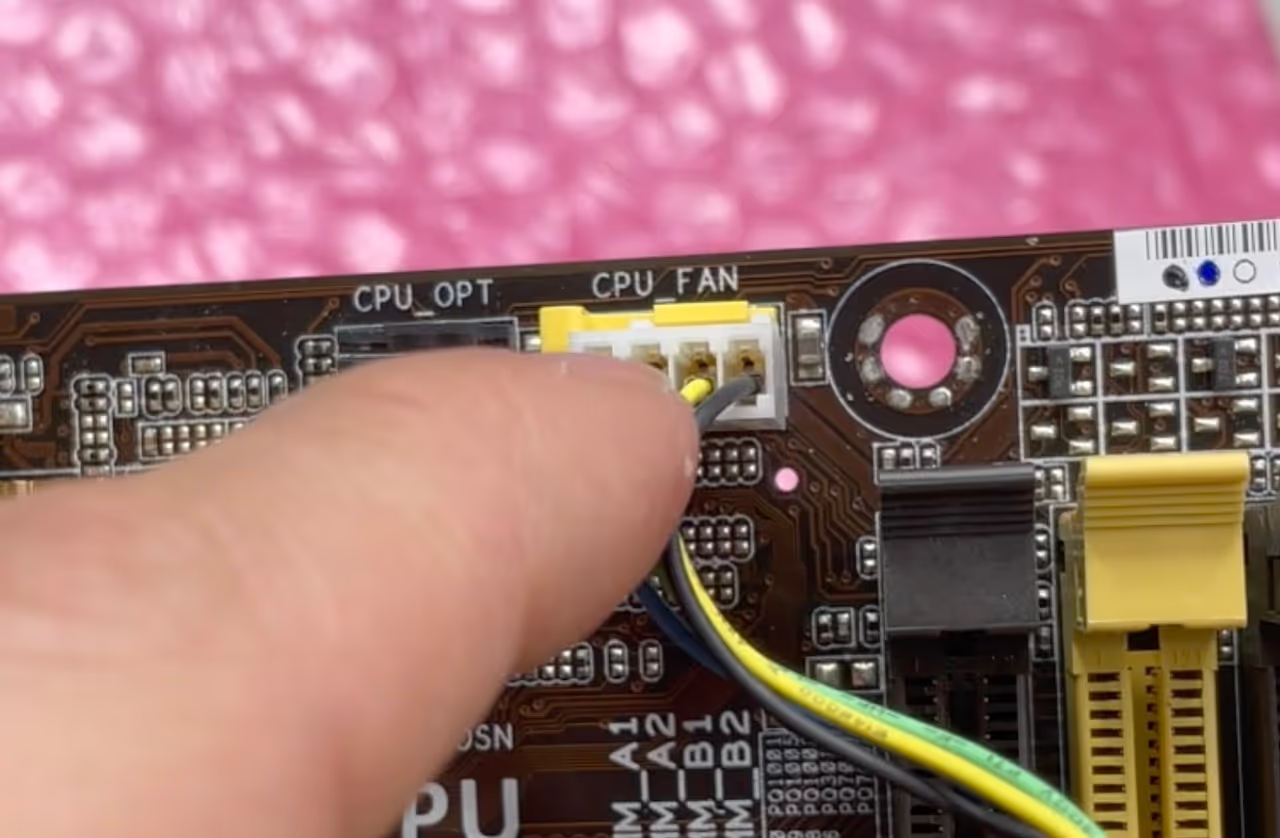
Now we come to the fan. To do this, you must first connect the fan connector to the mainboard, which is ALWAYS plugged into the four pins where it says "CPU_FAN".

CPU-Kühler-Stromversorgung

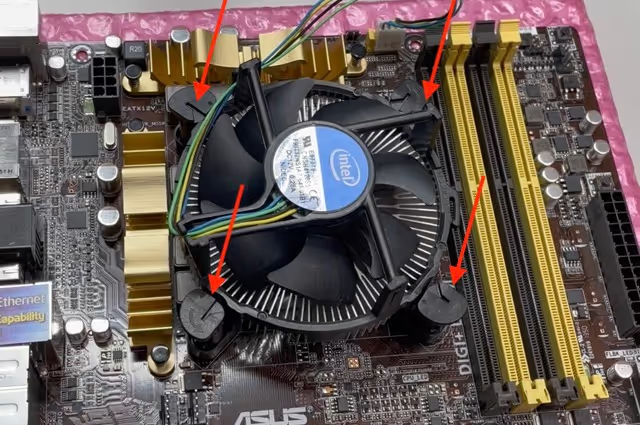
Now you can attach the fan properly to the board using the brackets. Make sure that all four brackets are properly seated. If you have a board with an AMD CPU, you must clamp the fan with the side brackets.

CPU-Lüftermontage Mainboard Mining Rig

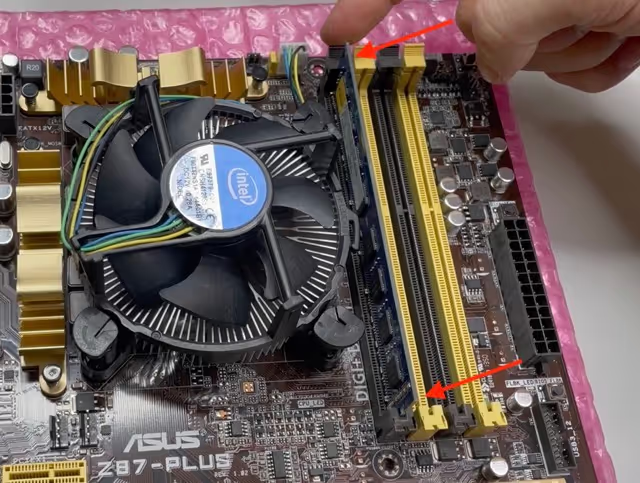
Then you need to insert the RAM bar onto the board. Here, too, you need to make sure that the RAM snaps in properly and sits correctly. Incidentally, with some boards it is relevant which of the RAM slots you insert the bar into, so if in doubt you should check the operating instructions for the mainboard to see which slot must be occupied.

RAM-Montage Mainboard Mining Rig

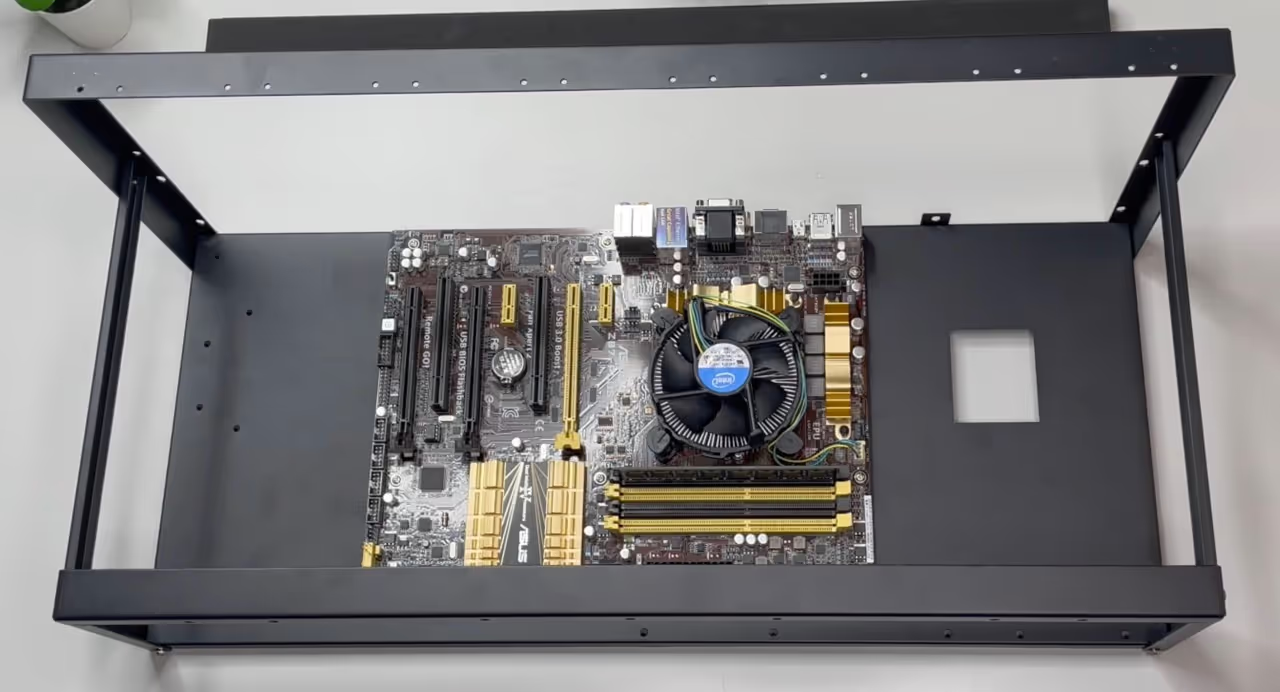
Finally, you can now screw the board onto the mainboard holders. However, make sure that you do not overtighten the screws so that the board is not damaged.

As a little tip from us, make sure (even after assembling the rig) that there are no screws or other parts on or under the board, otherwise the board may not boot.

Mainboard auf Mining Rig Frame

3.3 Screw the power supply unit to the mining frame and attach the power button/start button

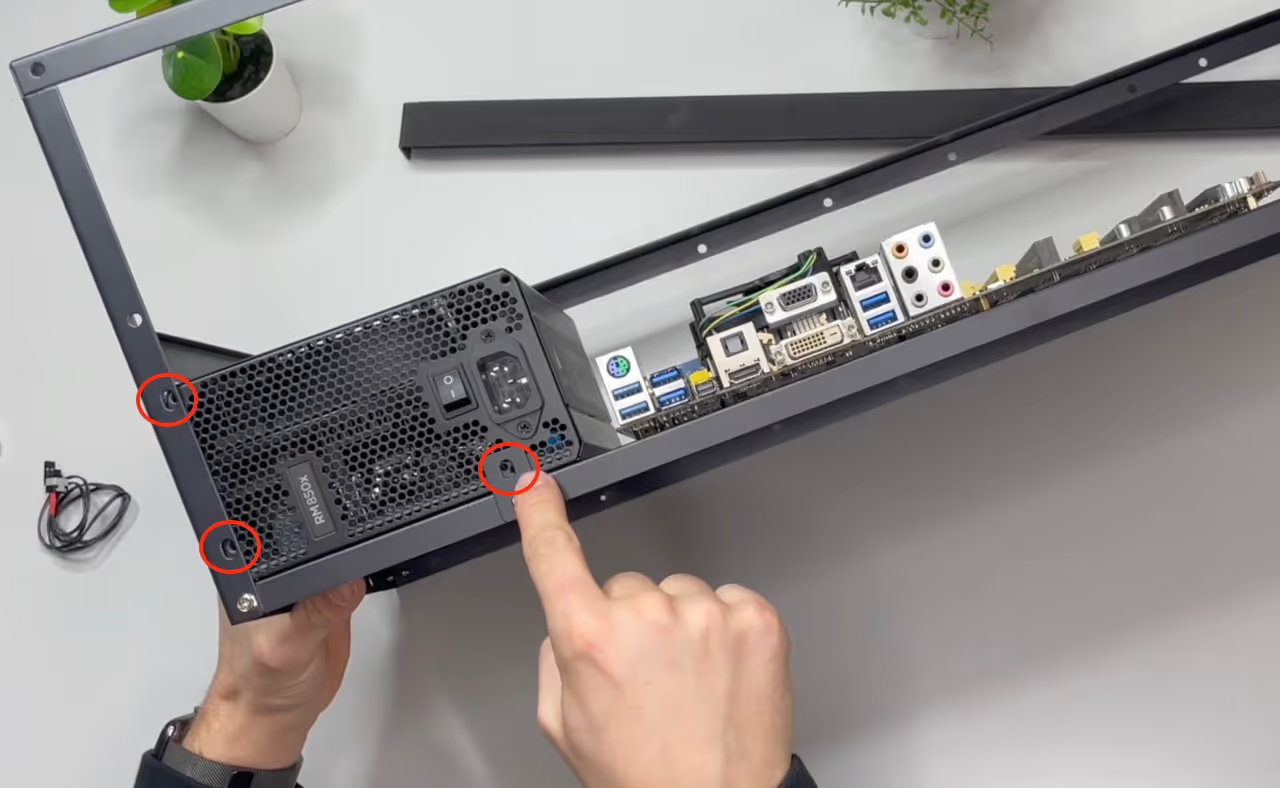
Now we come to the power supply unit. Mounting the power supply unit is super simple, all you have to do is position the power supply unit on the specified brackets on the frame (see red circles) and screw it in place.

Netzteil-Installation Mining Rig Frame

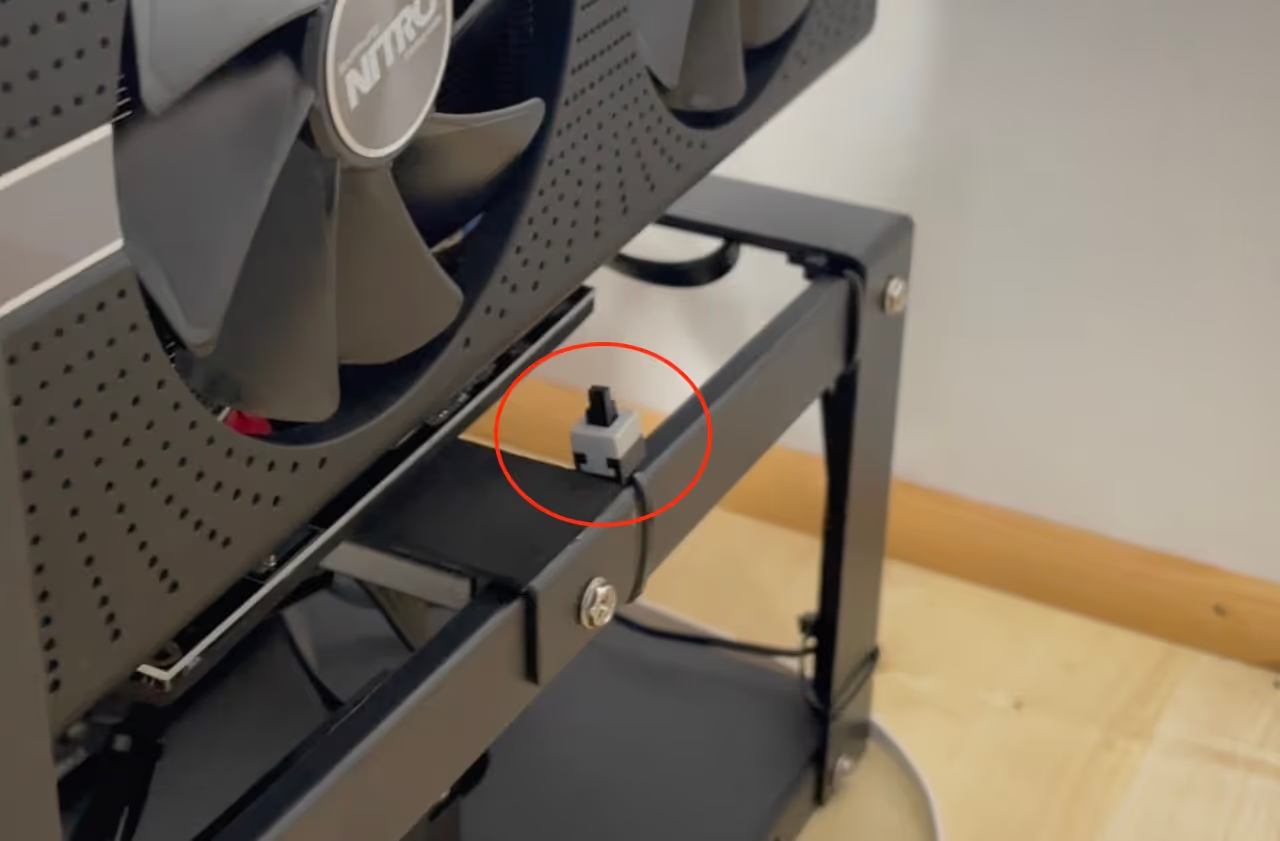
Now you need to connect the power button to the mainboard. There is only one plug connection (2 pins) on each mainboard, usually marked "PWR_SW". If not, simply refer to the operating instructions for the mainboard. If the connector is fixed, you can position the on/off switch anywhere on the rig where you want it to be.

Mainboard Powerbutton Startknop Installation

3.4 Attaching the additional LED housing fans

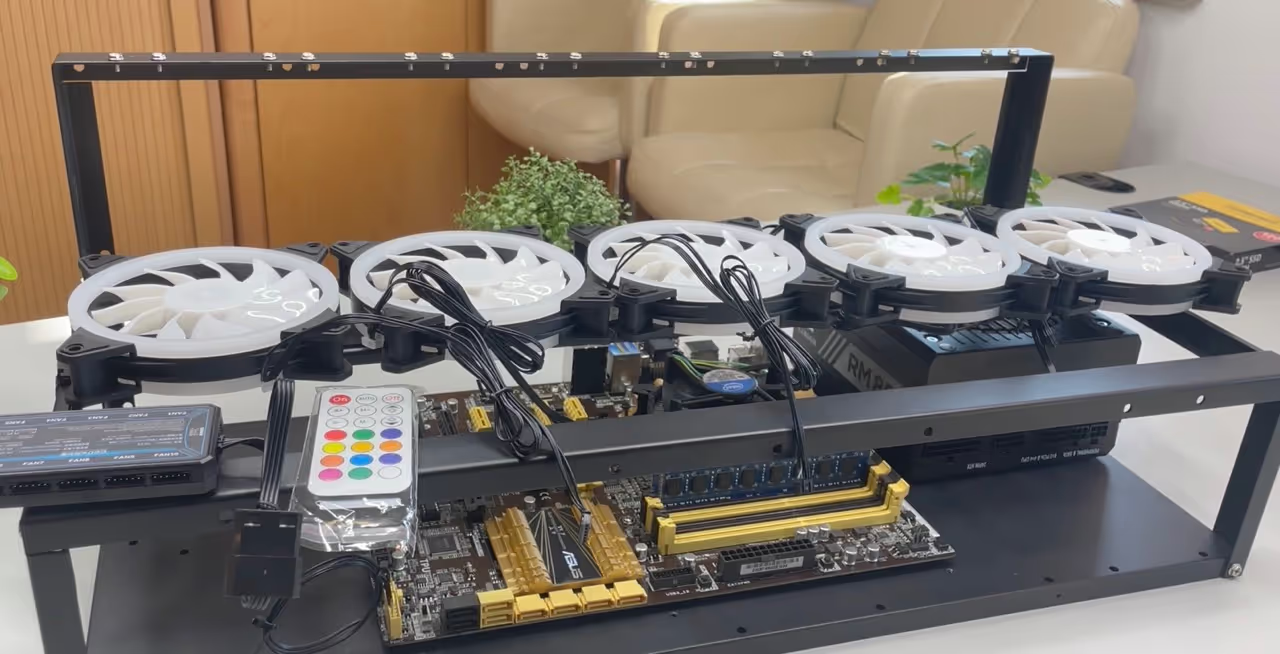
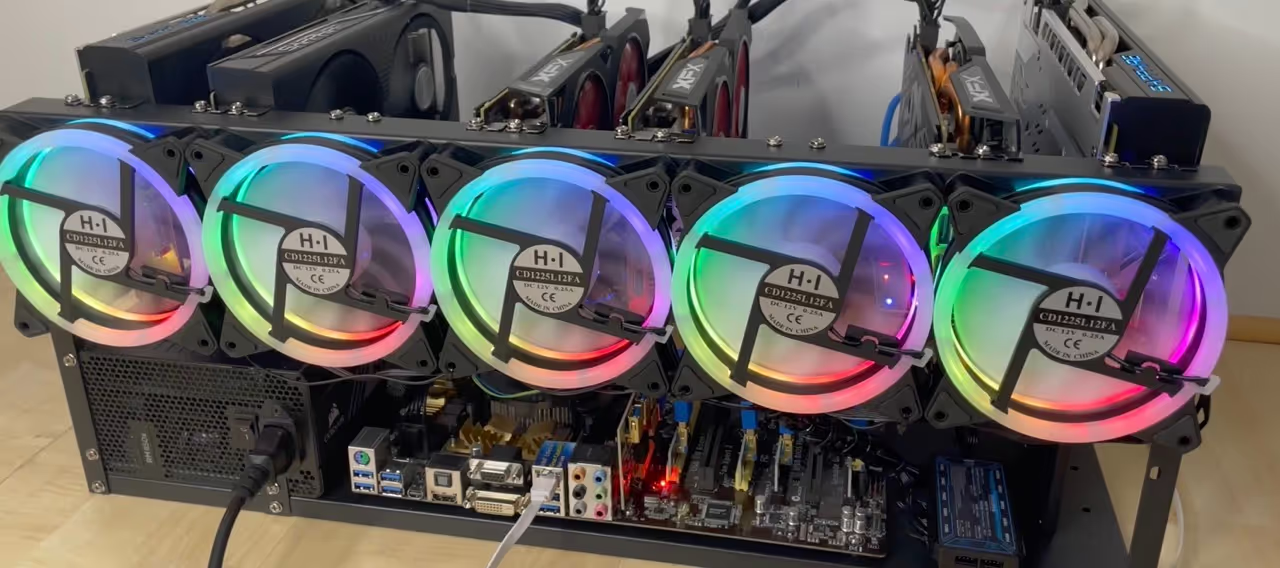
Continue with the additional housing fans. These must be attached to the frame using the screws supplied. The fans can be positioned in both directions: Airflow towards the graphics cards or airflow (or suction) away from the GPUs. Theoretically, both directions are okay, but it is usually better to "pull" the warm air away from the cards so that the heat cannot build up there.

Gehäuselüfter Montage Mining Rig

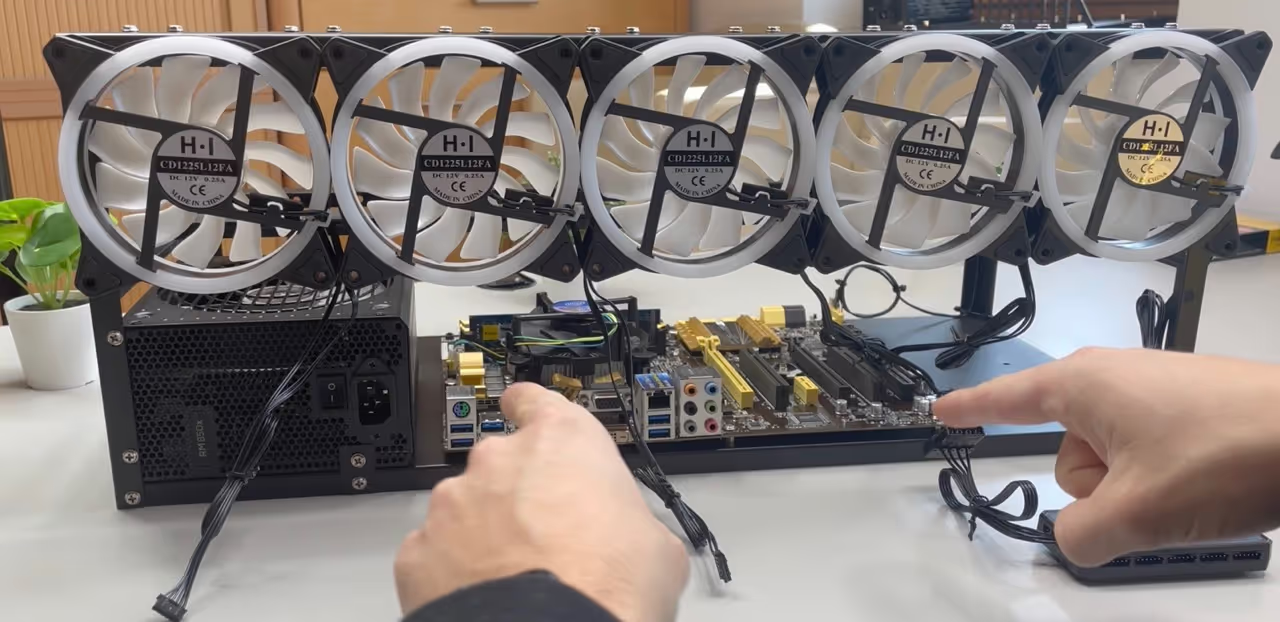
Once the fans have been fitted, the power cables of the fans must now be connected to the plug box. I recommend that you make a real effort here and bring the cables together properly with cable ties and then plug them into the box in an orderly fashion. Cable clutter is always annoying when it comes to attaching or detaching hardware (e.g. during assembly or for cleaning later) - and it also simply looks better when the cables are neatly laid out.

Zusatzlüfter-Verkabelung Mining Frame

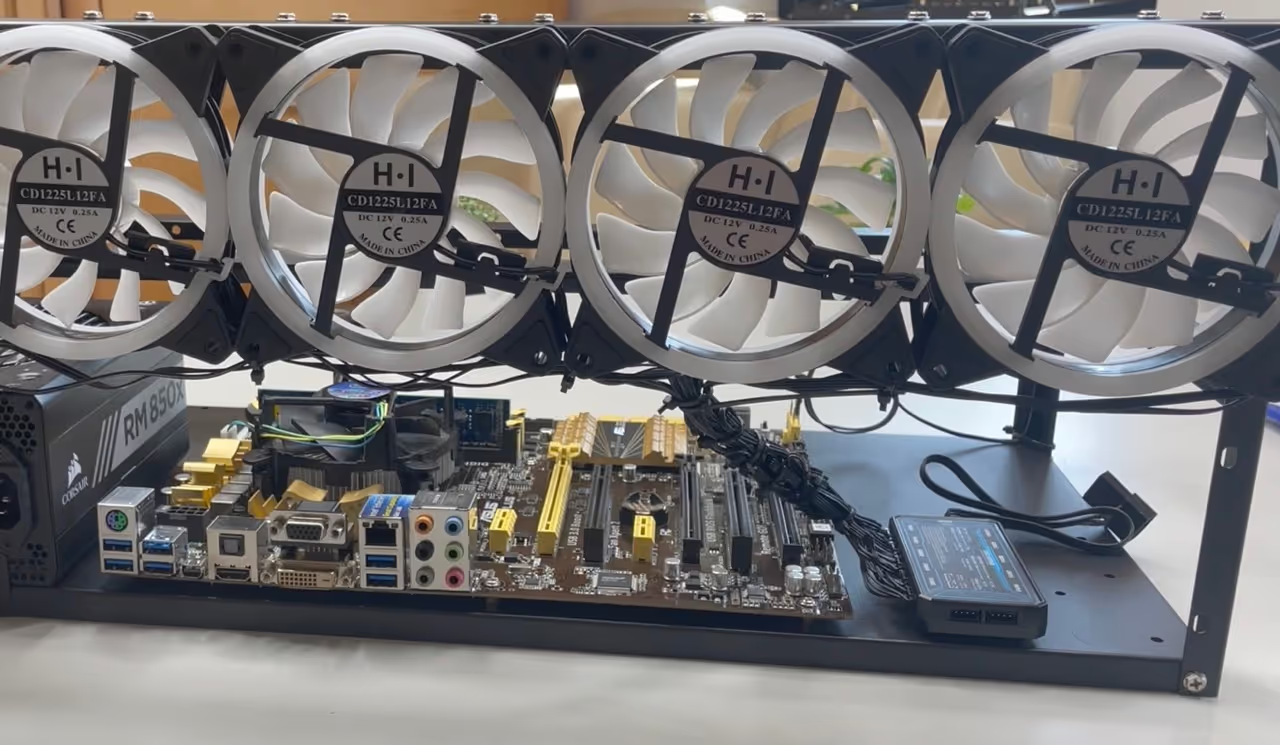
So sieht sieht beispielsweise eine ordentliche Verkabelung aus, alle Kabel wurden mit Kabelbindern zu einem Strang zusammengeführt und dann an der Steckerbox angebracht.

Zusatzlüfter-Verkabelung Mining-Rig Frame

3.5 Hive OS auf der SSD installieren und Festplatte an den Frame schrauben

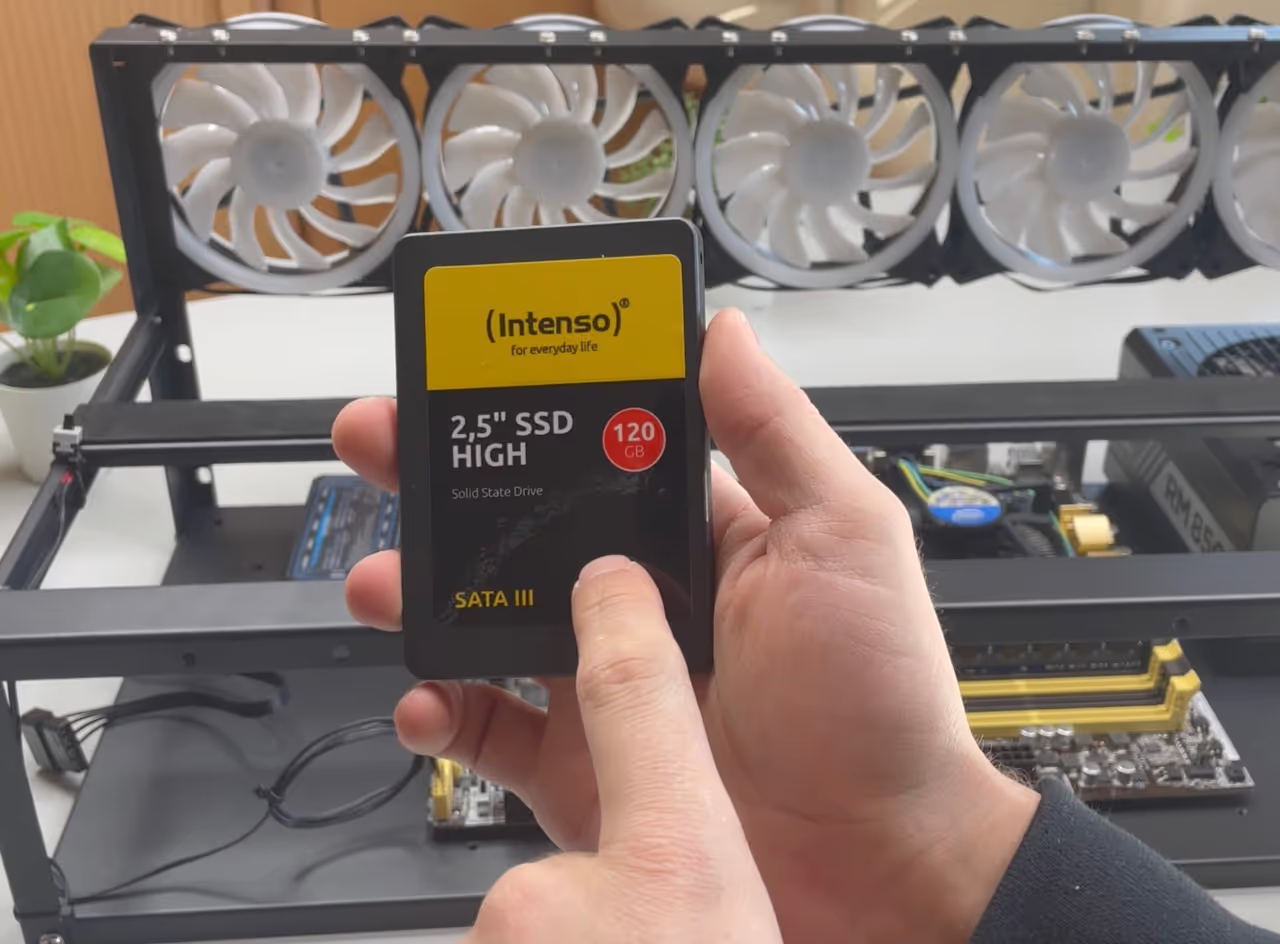
Now it's the turn of the hard disk, the SSD. You now need to install Hive OS on it. We have explained exactly how the installation of Hive OS works Here. You can of course also mine with Windows, but we always recommend using Hive OS for various reasons.

Hive OS Installation Mining Rig

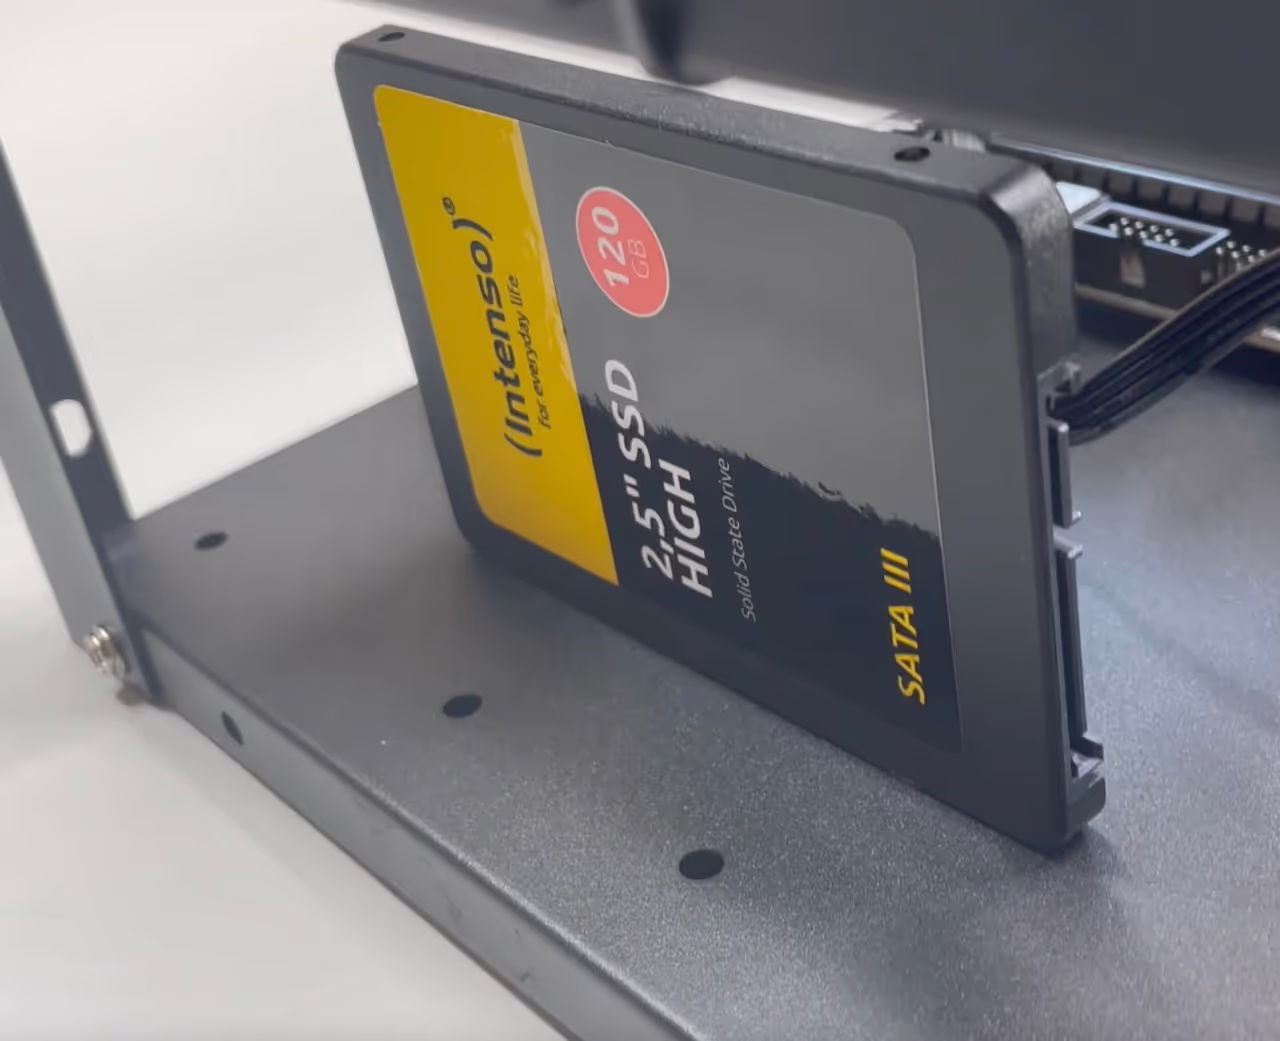
Once you have installed Hive OS on the SSD, you can screw it to the rig frame. Most frames have pre-drilled holes for this (for all hard disk types).

Hive OS SSD Mining Rig

3.6 Power cabling for hardware

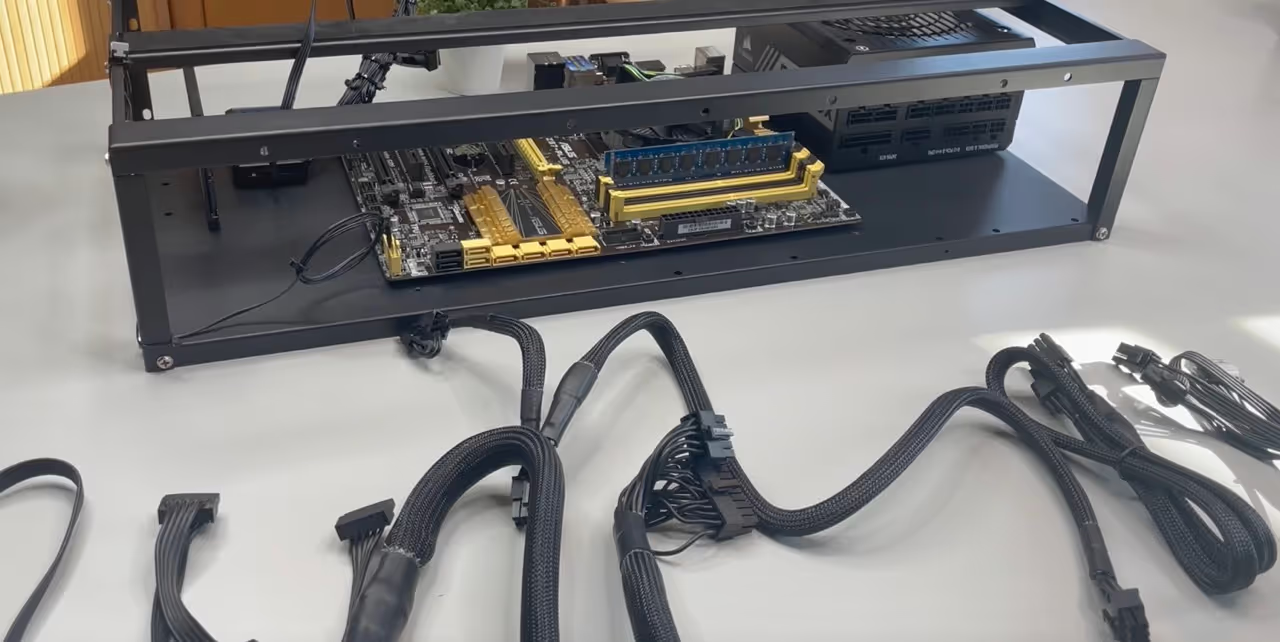
Now we come to the power cabling. Just as with the fan cabling, we recommend that you take your time and attach and lay all cables properly. Proper cable management is the be-all and end-all of rig building.

Mining Rig Frame Verkabelung

First, attach the power supply for the mainboard. The plug connection is relatively large and must (usually) be pressed into the adapter with some force. Make sure that the cable is facing in the right direction when attaching it.

Zusatzlüfter-Verkabelung Mining-Rig Frame

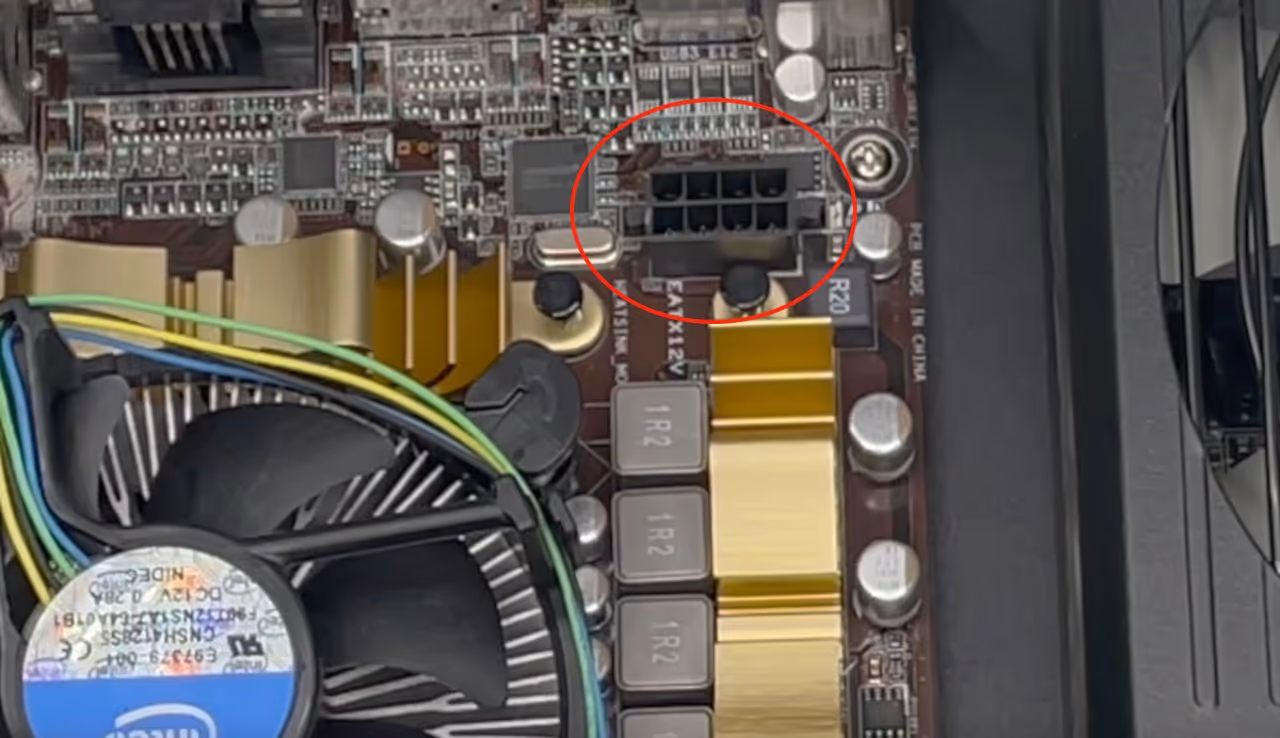
Now you need to supply the processor with power and plug the CPU cable into the CPU connector. Make sure that you use the correct cable, as the CPU cable looks very similar to the PCIe cable (for the graphics cards).

Incidentally, some older mainboards only have one 4-pin connector for the processor, which is why all CPU cables can be "split" in the middle.

Mainboard Nahansicht CPU Stromkabel

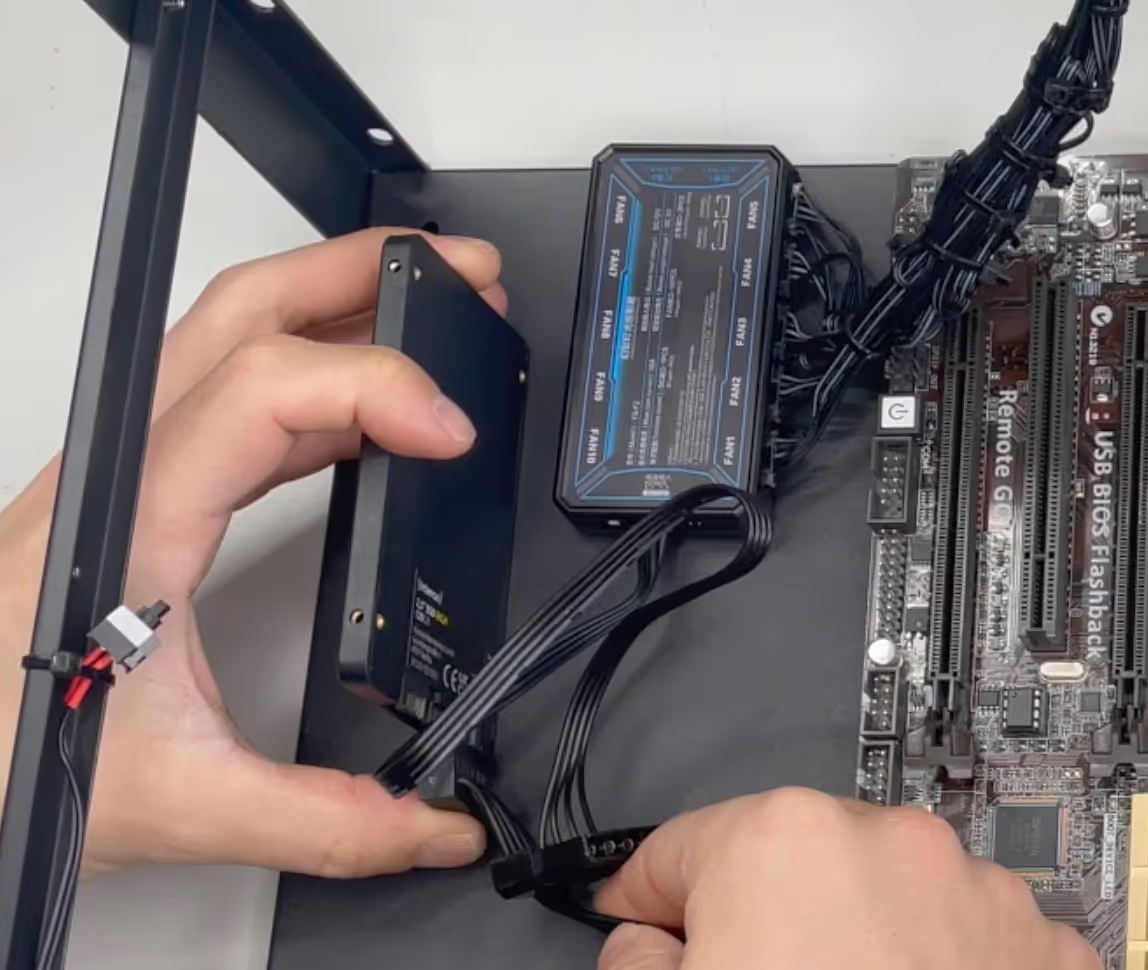
Als nächstes verbinden Sie die Zusatzlüfter und die SSD mit einem SATA-Stromkabel. Teilweise kann es sein, dass die Lüfter einen Molex-Anschluss haben, dann verbinden Sie den Lüfter mit dem passenden Molex-Kabel.

Stromverkabelung SSD und Gehäuselüfter

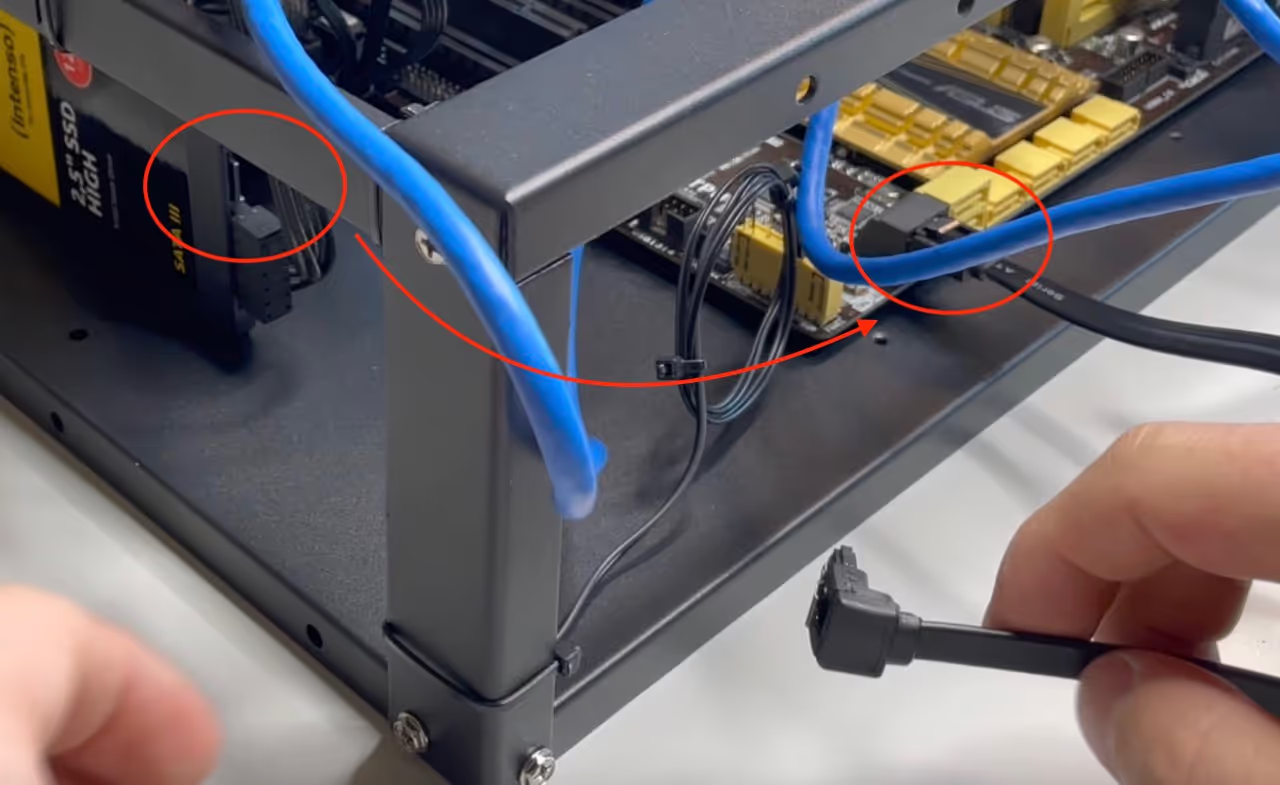
Now you can connect the SSD to the mainboard via the SATA data cable.

SSD zu Mainboard über SATA-Datenkabel

3.7 Connecting the GPU riser

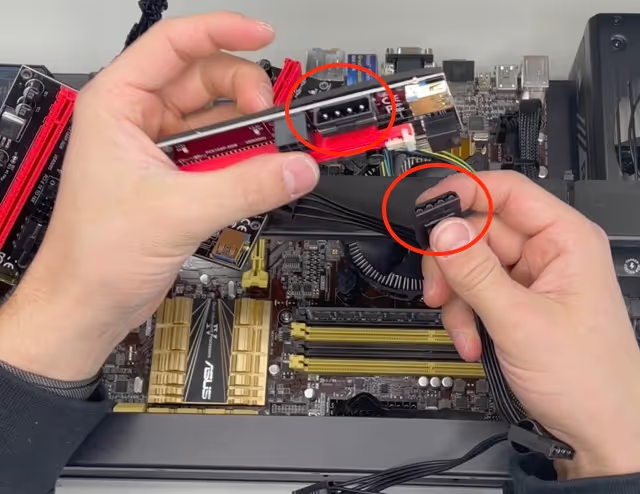
Now you need to attach the GPU risers and connect them to the power supply unit. ATTENTION: in this example rig, we are using a Molex connection for the risers. However, a Molex cable is not suitable in all cases. In the first part, we taught you that a graphics card can draw up to 75 watts of power via the X16 connection (or via the riser). However, a Molex connection is only designed for a maximum of 75 watts (PCIe up to 288 watts). Many graphics cards (e.g. AMD RX 580) only consume a total of 70-80 watts, whereby a large proportion of the power is supplied via the power cabling, in which case a Molex power supply to the riser is perfectly acceptable. With a power-hungry NVIDIA RTX 3090, however, the graphics card can draw up to 75 watts of power through the riser. As you should not use 100% of the possible performance of the hardware in 24/7 continuous operation, you should definitely supply the riser with power via the PCIe connectors.

GPU-Riser Verkabelung

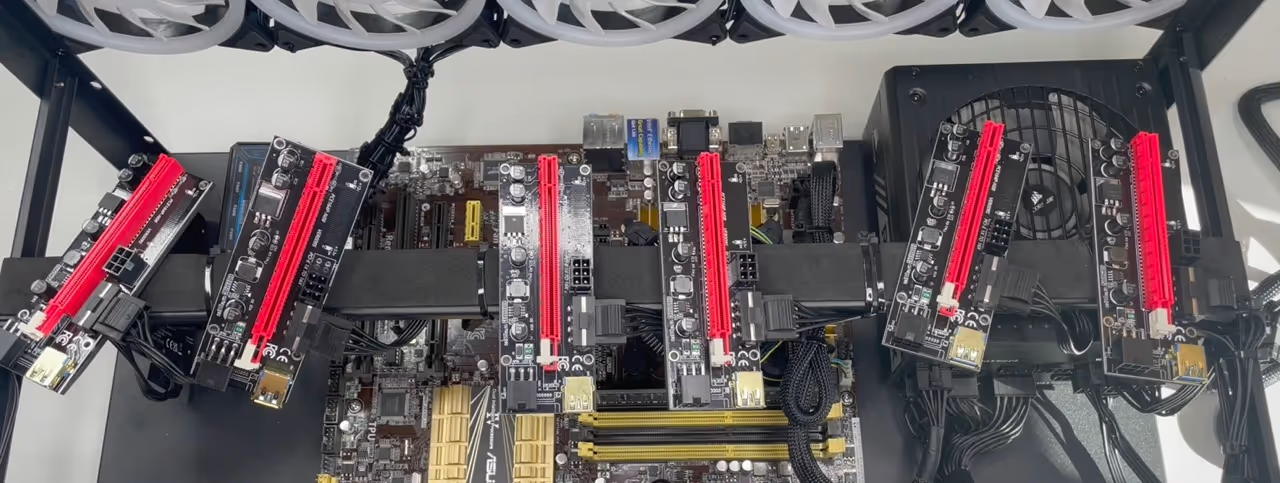
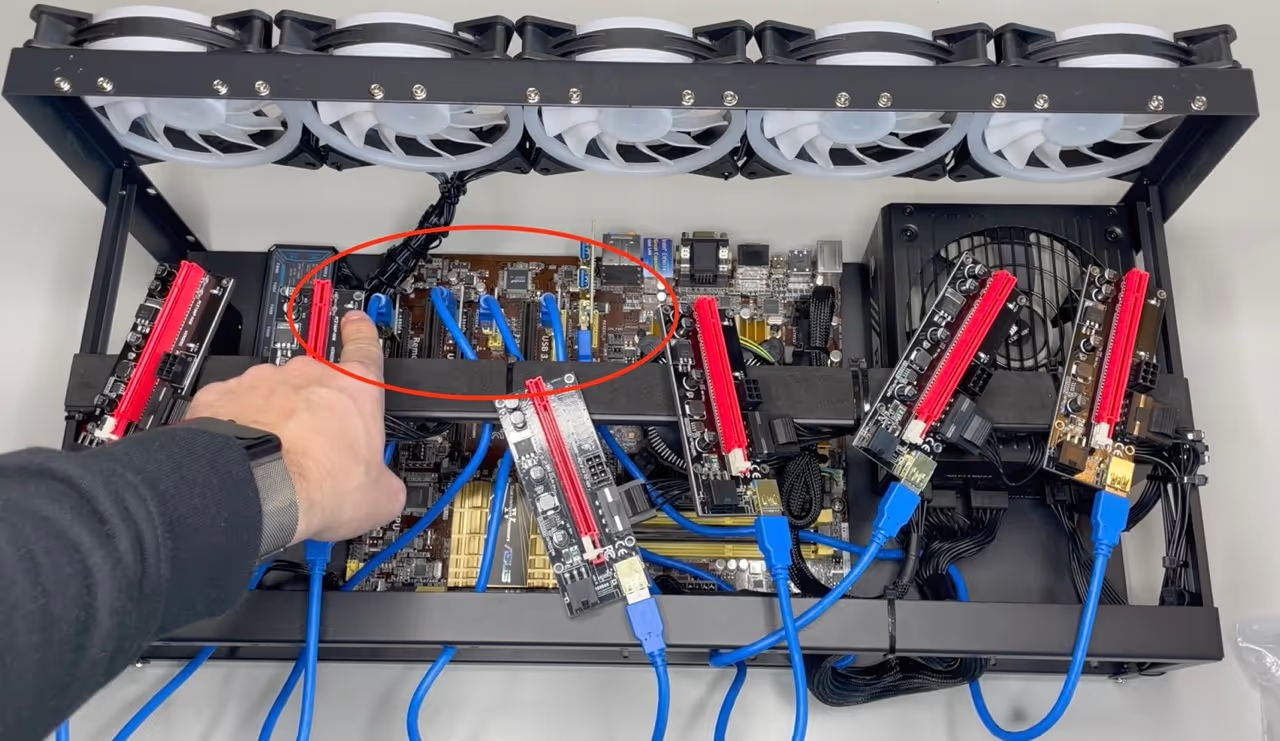
In this case, we have attached 6 risers for 6 graphics cards to the 8-GPU frame. Of course, you must always install as many risers as you want to connect graphics cards to the rig.

GPU-Riser Mining RIg Frame

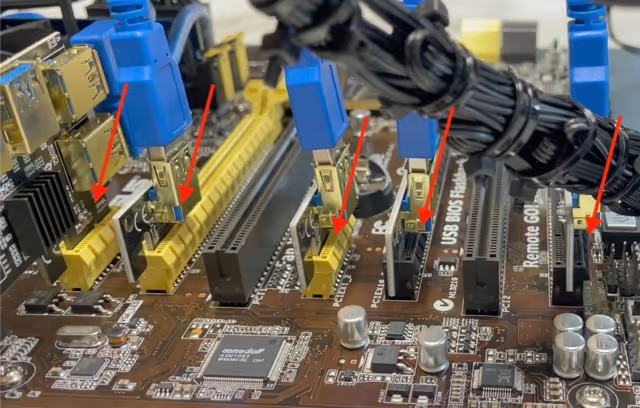
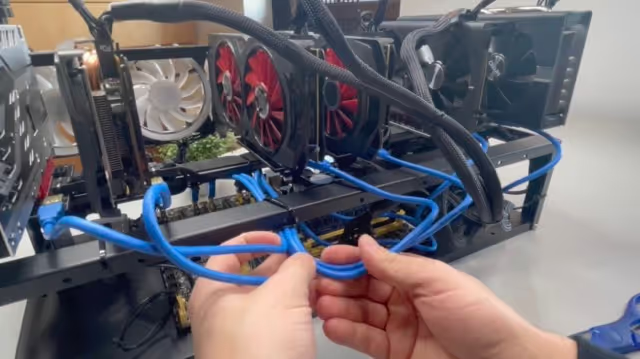
Next, the GPU risers must be connected to the mainboard via the USB cables and PCIe-X1 connectors.

Mining-Rig ohne GPUs

Incidentally, you can use the X1 connectors as well as the X16 connectors on the mainboard for the PCIe X1 connectors. In our example here, we did not have enough connectors (X1 & X16) on the mainboard, which is why we installed a GPU splitter card (see chapter 2.3) so that all risers (and graphics cards) can be connected to the mainboard.

Mainboard Mining Riser PCIe X1 X16 Anschlüsse

3.8 Connecting the graphics cards

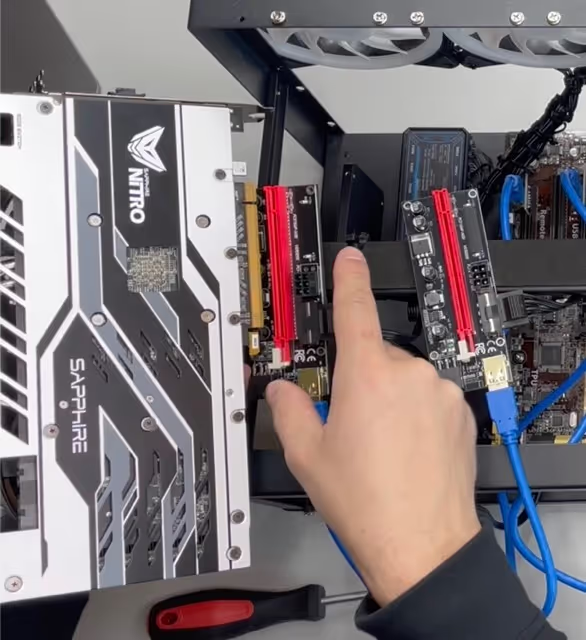
Now you can connect the graphics cards to the risers. All you have to do is plug the GPUs with the X16 connection into the riser. You c

Riser GPU-Montage Mining Rig selber bauen

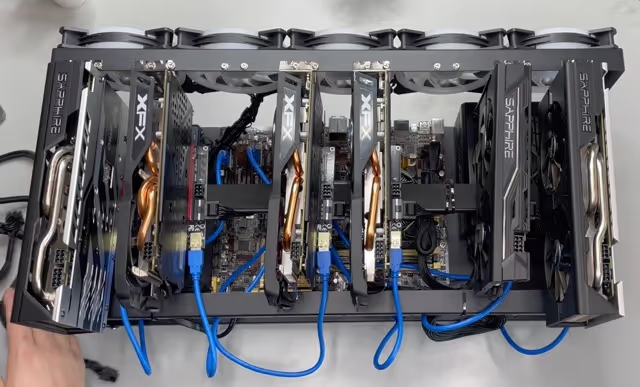
This is what it looks like when all the graphics cards are connected to the risers and properly screwed in place. Incidentally, 2 more GPUs could be attached to this one, but then you would need a more powerful power supply unit (80% rule).

GPU-Montage Mining Frame

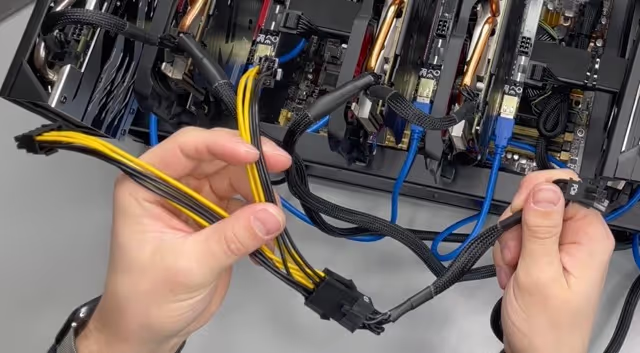
You can now supply the graphics cards with power using the PCIe 8-pin to 2 x 6+2 pin connectors. For some cards, one PCIe connector is sufficient, while some GPUs require up to three (e.g. RTX 3090).

GPU-Installation Mining Rig selber bauen

If you do not have enough cables or PCIe 6+2 connections, you can use splitter cables (pay attention to the maximum current flow), which turn one 6+2 connection into 2 x 6+2 connections.

PCIe Splitter-Kabel für Mining Rig

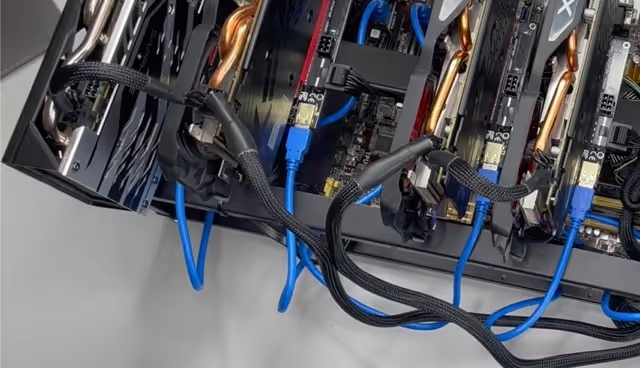
After you have supplied all the graphics cards with power, you should neatly bring all the cables together again and "tidy up".

Kabelmanagement Mining Rig selber bauen

3.9 First start of the mining rig

The assembly of your rig is now complete. You can now start your mining rig for the very first time. All you have to do is briefly press the power button.

Startknopf Powerbutton Mining Rig

Now your rig should (ideally) start and you can continue with chapter 4, setting up the software. If you have problems with starting the rig, you can find troubleshooting solutions here.

6er GPU Mining-Rig

4. Setting up Hive OS

4.1 Hive OS start interface - Mining rig overview

Welcome to the Hive OS. Hive OS is structured in such a way that you can see all your farms on the start page. The farm is the collective of workers (GPU miners as well as ASICs) that you have assigned to the farm. If your mining rig has been started correctly, it should now appear in a farm. Incidentally, you cannot set Hive OS to German, but there are other languages such as Russian and Turkish.

Hive OS Übersicht Interface Farms

If you go to the farm, you will now find your mining rig - the worker. You can change the name of the rig at any time in the settings, even from the farm. Click on "Rig #123456" to go to the worker overview.

Hive OS zum Worker kommen

This is what the overview of the mining rig looks like. All the graphics cards that Hive OS has recognized are listed in the middle. Incidentally, Hive starts counting at 0, so don't be surprised. In this interface, you can completely configure and monitor your worker.

Hive OS Übersicht Interface Worker

4.2 The setting options in the Hive OS

You can also set the overclock settings (the performance settings) directly for the graphics cards, and there are a few more KPIs at the bottom of the bar. At the top of the top bar you can, for example, restart or switch off the rig (power button), update the rig (up arrow), start and stop the miner (the pickaxe) or set the autofan (fan).

Hive OS Worker update: if you click on the icon with the up arrow, you can update and downgrade your rig at any time. So if there are any problems with the software, simply upgrade the rig, this usually solves all problems.

Hive OS System Update

A very important tool in Hive OS is the auto-fan controller. The auto-fan tool automatically regulates the fan speeds of the graphics cards, depending on the temperature ranges you have selected. The critical temperature can be set at the top.As soon as the cards have reached this temperature, the miner stops automatically or the rig shuts down. The critical temperature should be around 80 degrees. If the GPUs get warmer, this is really not good for their longevity. Also important is the Target Core TEMP, which is the general temperature that Hive OS should maintain. Min fan speed is the minimum fan speed at which the fans should rotate, max fan speed is the maximum speed. I would definitely set this to 100% so that the fans can cool at maximum power. After setting, press "Apply".

Hive OS Autofan Tool

4.3 Setting the flight sheet - instructions for coin, wallet, pool and miner

The flight sheet can be found in the middle bar next to the worker. The flight sheet instructs the miner which coin to mine, to which wallet the mined cryptos should be transferred, which pool the miner must use and which software miner it should run. You now need to create a flight sheet for your mining rig by clicking on "Add Flight Sheet".

Hive OS Flight Sheet hinzufügen

1. select the coin you want to mine. Hive OS gives you a huge selection for this.

2 Here you must store the appropriate wallet for the coin you are mining. For example, if you want to mine Ethereum Classic, you also need to store an ETC wallet. You can use a software wallet, the wallets of your crypto broker (e.g. Binance) or a browser wallet such as MetaMask.

3 Here you select the pool you want to use. Our favorite pools are Ethermine and 2Miners.

4. Finally, select the mining software. Our tip (if the coin is supported) is TeamRedMiner and T-Rex-Miner.

5 Finally, give the "instruction" a name and click on save. Then click on the rocket and the flight sheet will be applied to the miner.

Hive OS Flight Sheet Einstellungen

4.4 Hive OS GPU overclock settings - The graphics card settings

Now we come to the overclock settings, which are (usually) the most complicated for a beginner. The overclocks are the graphics card performance settings with which you optimize the card -> maximum possible performance with the lowest possible power consumption. To open the overclock settings, you must click on the speedometer for the respective graphics card.

Hive OS GPU Overclocking

Each card must be optimized for each coin. It sounds like a lot of work, but you can usually find the perfect settings directly on Google or in the "Popular presets", which you can find in the menu at the top right. These are the most popular settings that miners use for the respective graphics card and the respective coin, which you can simply apply directly.

Hive OS Overclocking Presets für Grafikkarten

Now you have finished setting up Hive OS and the rig will start mining. It will take some time until all values are displayed correctly, as Hive OS does not display the stats in real time, but with a slight delay.

Congratulations on your first self-built GPU mining rig! We hope you enjoyed our guide. If we were able to help you further, we would be very happy to hear from you! Otherwise, the entire Cryptohall24 team wishes you HAPPY MINING!

Hive OS Mining Rig läuft Übersicht

Forgot something? Here we go back to the first part, the introduction to crypto mining and the best and most high-quality mining hardware.

The first part is about the basics of crypto mining, what mining is, how a mining rig is structured and which hardware is best used for a rig.

Go this way
Cryptohall24 Mitarbeiter

Problems with assembly? We are happy to help!

We have been experts in crypto mining for many years and know exactly what we are doing. Very small mistakes can often be mind-boggling. If you get stuck, one of our experts will be happy to help you. With troubleshooting, we will localize your error together so that we can get your mining rig up and running as quickly as possible. If you no longer have the time or desire to finish building your mining rig, we will also be happy to take care of your mining project and finish building your mining rig. Just get in touch with us.

Why you should buy your mining hardware from Cryptohall24

4.9 / 5 stars
based on 94 Google reviews
12-month warranty via our German company, up to 24 months on request
Professional and transparent consultation for your planned mining project
Fast processing and shipping times
Free worldwide delivery including full transport insurance
Extensive 24/7 customer support in the following languages: German, English, Spanish, Turkish and Russian
100% customer focus - we are only successful in the long term if you are profitable and satisfied